Create a New Note or Label Dialog Options
Default settings for Notes and Labels are derived from the current Style Editor Annotation settings.
(For the Detail>Settings>Style Editor dialog, click here.)
The Detail>Notes>Key-In and Detail>Notes>Label functions use the same dialog, except that Detail>Notes>Label adds a fourth pane. Detail>Notes>Key-In uses Text, Format and Attributes and its dialog is named Note, described below. Detail >Notes>Label adds a Detailing lines settings pane and its dialog is named Label, described below.
Text Pane:
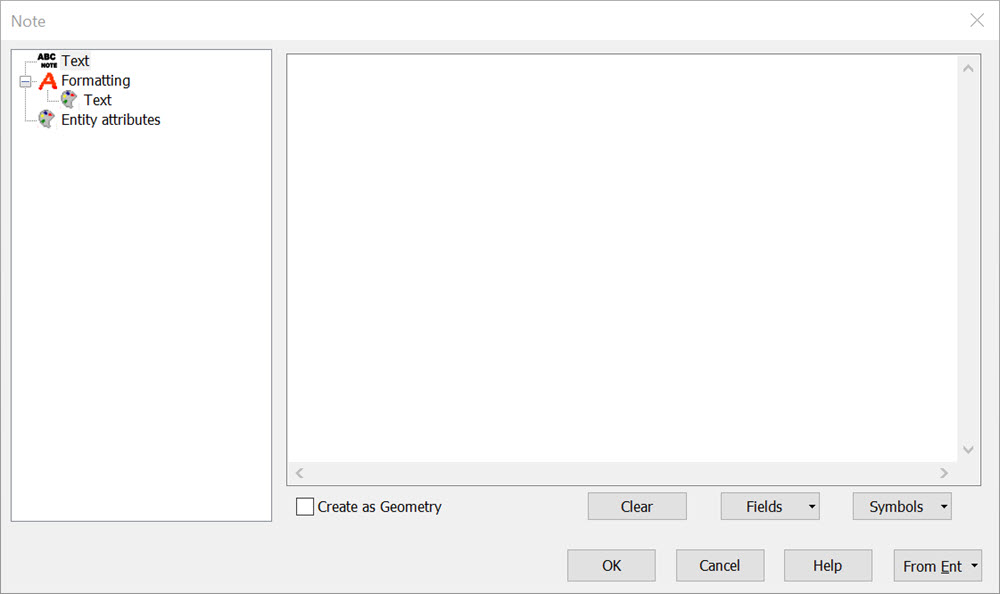
In the Text pane, enter the text that you want to appear in the note. Fields and Symbols can be added to the Note text . To incorporate a tab in your text, click CTRL+TAB. See Text Editor Symbols for the available symbols.
Create as Geometry
When not checked, the entire note will appear in the viewport as a single text entity. When selected, the note will burst into geometry. That is, it will appear in the viewport just like it does when this check box is cleared, except the components that make up the letters of the note will be individual entities (polyline for example).
Clear
Click to clear text you typed in the text field.
Fields
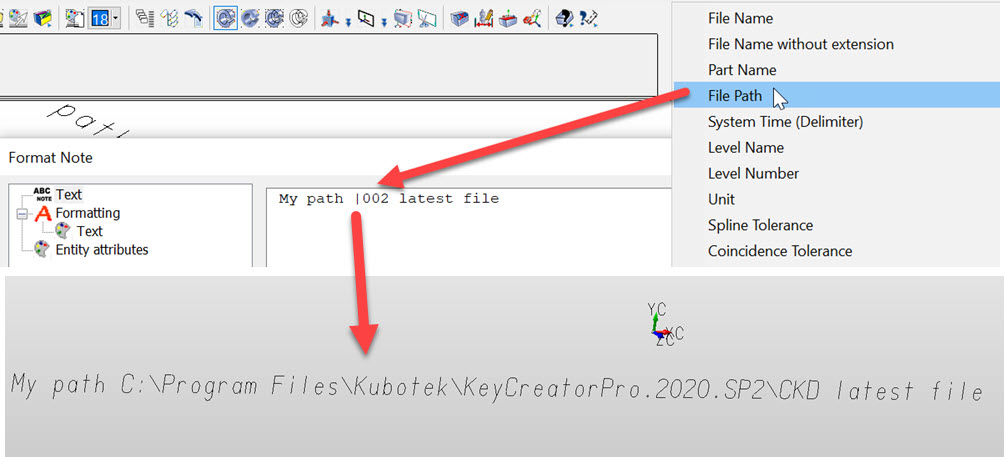
This button works similarly to the SYMBOLS button, in that it displays a fly-out list. When selected, a list appears, containing the available fields. Selecting a field from the list will automatically add a placeholder for that field inside of the note/label being created.
File Path Field example:
Symbols
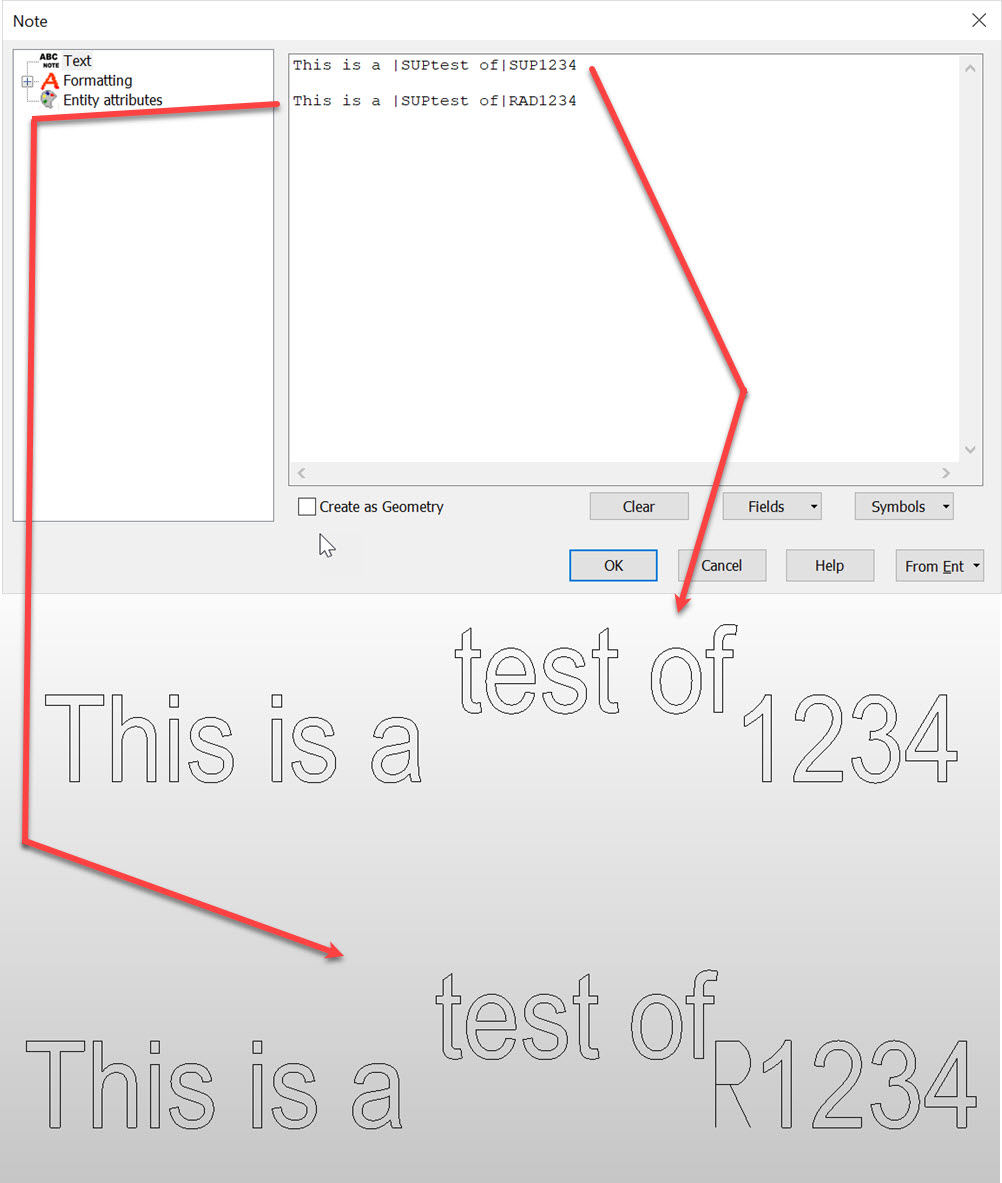
Select a symbol abbreviation from the list, or type the abbreviation, to add its corresponding symbol to the note or label you are creating. For example, "This is a test of |RAD 1234.", without quotes, results in, This is a test of R 1234. Note that the subscript and superscript symbol abbreviations start a subscript or superscript block of text, which ends at the next encountered symbol abbreviation. For example, both "This is a |SUPtest of|SUP 1234." and "This is a |SUPtest of |RAD 1234." (without quotes) result in the words "test of" as superscript (illustrated below)s:
From Ent
This option allows you to get the attributes for the Note or Label from a previously drawn Note or Label. The 3 options refer to the level of information to be taken from the original Note or Label to be applied to the Note/Label being made.
Page
The Page option will take the current highlighted tree menu item (such as the below arrow indicator on Formatting) and change the being created text to those setting when choosing From Ent and picking a previously created detail.
Page and Children
The Page and Children option will perform as above and include any sub-tree menu item. If Formatting was the focus then both Formatting and the sub-menu Text attributes would be applied.
Group
All tree menu items for the selected detail would be applied
Formatting Pane:
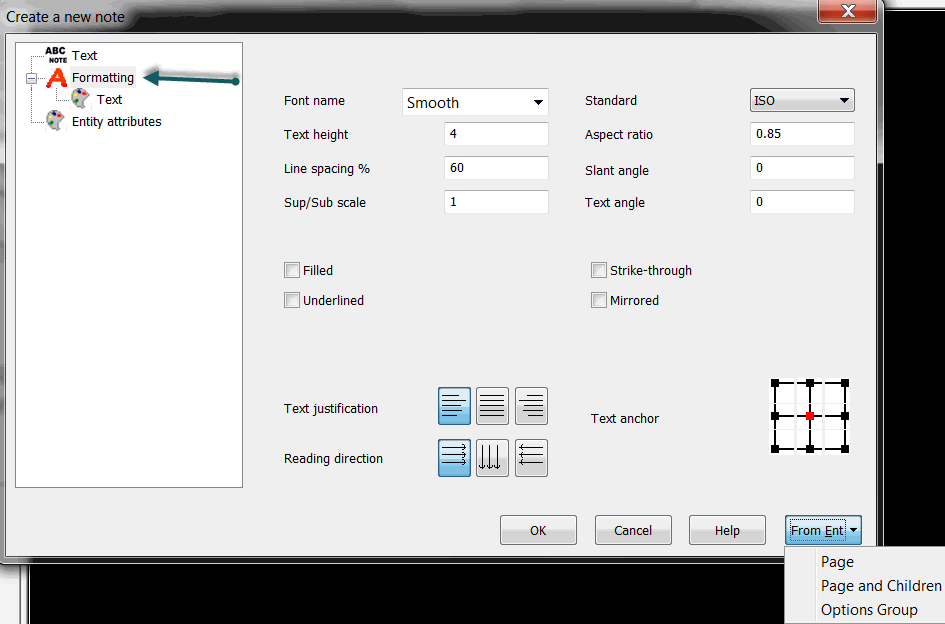
Font name
Select the font style that you want for your note text. The font list contains all of the fonts that are currently loaded on your system.
Standard
The detailing standard that is used as a guide for the formatting of the detail entities.
Text height
Determines the height of the text entity. Specify a value for the text height.
Aspect Ratio
Determines the character width to height ratio. For example, if the character height is 2 and the character width is 1, the aspect ratio is .5 or ½. Specify a character aspect ratio greater than or equal to .01 and less than or equal to 100.
Line spacing %
Determines the amount of space between successive lines of drawn, plotted or printed text in a note. Specify a line spacing factor in the input field. The factor is the ratio between the current text height and the line spacing. For example, if your text height is one inch and spacing between text lines is one-half inch, the line spacing factor is .5 (50%).
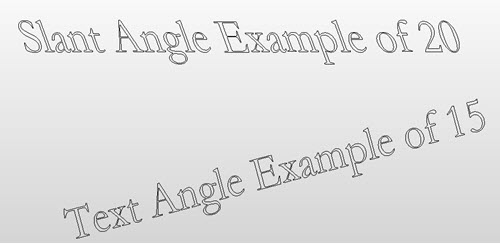
Slant Angle
Slants the character text to any angle between –31° and 31°. Specify a value for the angle.
Text angle
Determines the angle of an entire string of text in note entities. Specify a value for the note angle.
Slant and Text Angle Example:
Sup/Sub Scale
Controls the scale of super-script and sub-script text. Super-script and Sub-script text can be added using the Symbols menu entries with the same names. Specify a value for the scale.
NOTE: The subscript or superscript is terminated at the next symbol encountered.
Checkboxes
-
Filled Font – fills the inside area of note text characters.
-
Strike through – creates a line through the text characters.
-
Underlined – underlines the text.
-
Mirrored – creates mirror images of the text.
Text justification
Select the appropriate button option to justify the text left, right or centered.
Text anchor
Specify a text anchor position by clicking on the grid. The positions represent upper, center and lower left; upper, center and lower center; and upper, center and lower right. When you click on the desired anchor position, the point turns from black to red. Each placement position represents where the text begins with respect to the cursor indicated position.
Detailing lines Pane (Detail>Notes>Label function only):
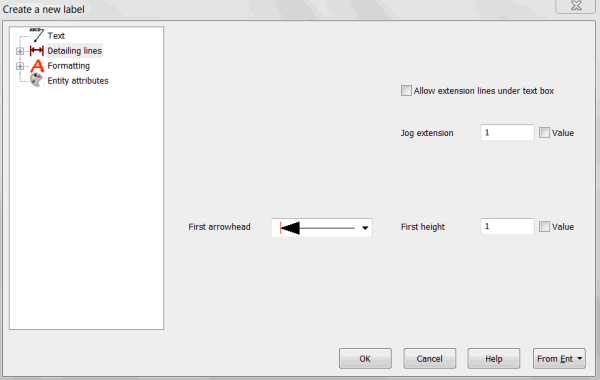
For information of the elements on this pane, click here, scroll to Detailing lines and see the applicable descriptions.
Attributes:
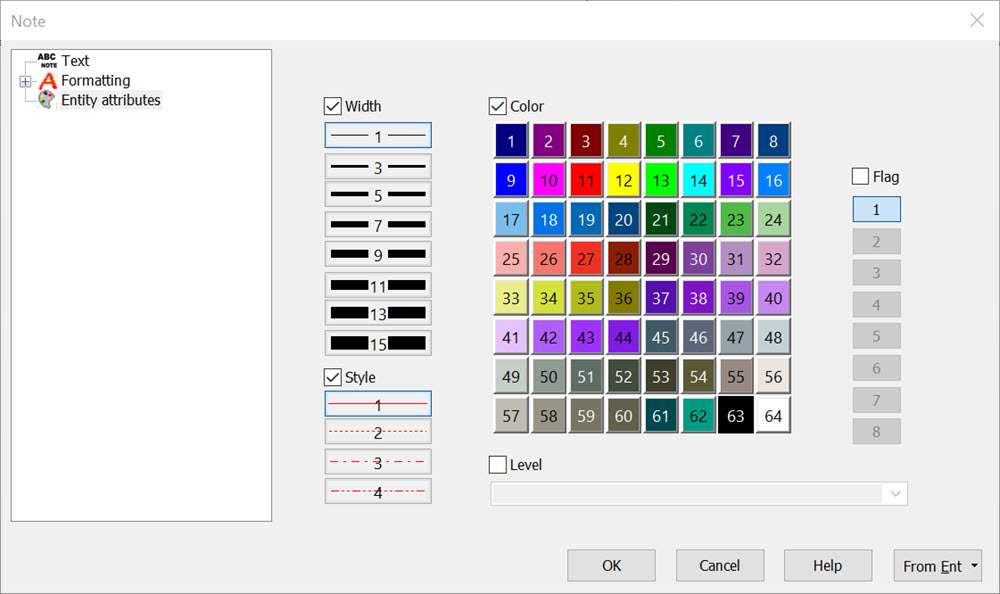
Change the attributes of the entity by clicking on the ATTRIBUTES dialog button. The Attributes pane then appears. For more details, see Dimenion Attributes.