Setup

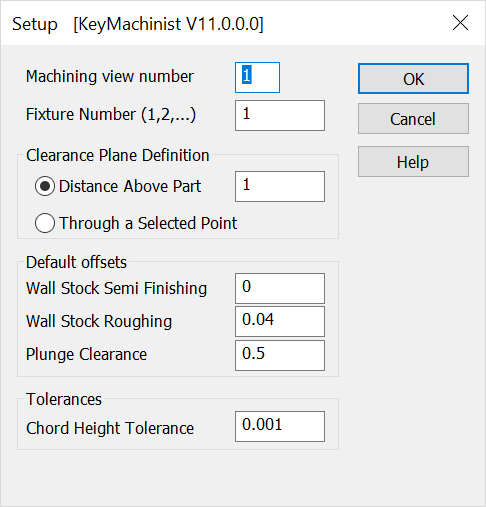
Use the Setup feature to specify the default parameters for the machining process. When this feature is selected, a dialog box appears through which you can specify the machining view number, clearance plane definition settings, default offsets, and tolerances. For in-depth coverage of each function within Machinist use the MachinistRefManual .
Dialog Options:

Machining View Number
This is the current system view defined in KeyCreator. The entered view number will determine the machining orientation. The default view is 1 (top view).
Fixture Number
Designate the fixture to be used.
Clearance Plane Definition
The clearance plane is the plane at a Z-depth at which the cutting tool can move freely above the stock. Rapid tool movement occurs here, so it is important to select this distance carefully.
-
Distance Above Part – This setting specifies the distance above the part where the cutting tool moves above the geometry selection. Enter a distance in the field provided.
-
Through a Selected Point – This setting determines the rapid traverse level using a pre-defined point in space.
Default Offsets
-
Wall Stock Semi Finishing – Specify a default setting for the 3D stock amount to remain.
-
Wall Stock Roughing – Specify a default for the 3D stock amount to remain.
-
Plunge Clearance – Specify a height value for the distance above the cutting plane at which the z-Axes will enter feed mode.
Tolerances
-
Chord Height Tolerance – This specified value will determine the maximum deviation from the surface.