KeyCreator / Modify / Solid Face / Extrude Face

Use the Extrude Face function to extrude a face of an existing body along a vector. To use this function, follow the steps below. Note that the required steps might change depending upon what settings are selected in the dialog for the function. When using the "To Face" option you can select a solid face in a part reference.
Using the Function:
-
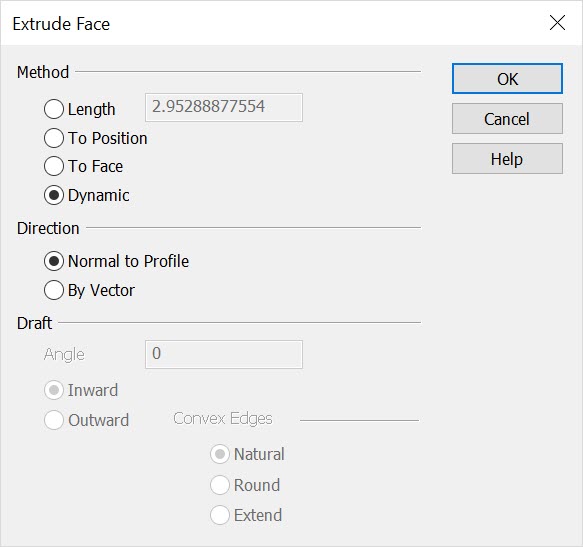
Select Extrude from the Modify>Solid Face submenu. The Extrude a Face of a Solid dialog box appears, from which you are able to specify end method, direction and draft for the extrusion. These settings are explained below.
-
Once the dialog settings have been configured, select OK to accept the changes.
-
Select the planar face to extrude.
Dialog Options:
End Method
The options under End Method allow you to specify how the extrude will end; either by an indicated distance, or to a face.
-
Length - Indicate a length value. The face will be extruded to this indicated length.
-
To Position – When selected, you will be prompted to select a position to determine the length of the extrusion. This position is only used as a point of measurement.
-
To Face - When selected, you will later be prompted to select a face to which the extrusion will extend to. (Note that you can select faces on solids or bodies outside of the active part during in-context editing mode of assemblies.)
-
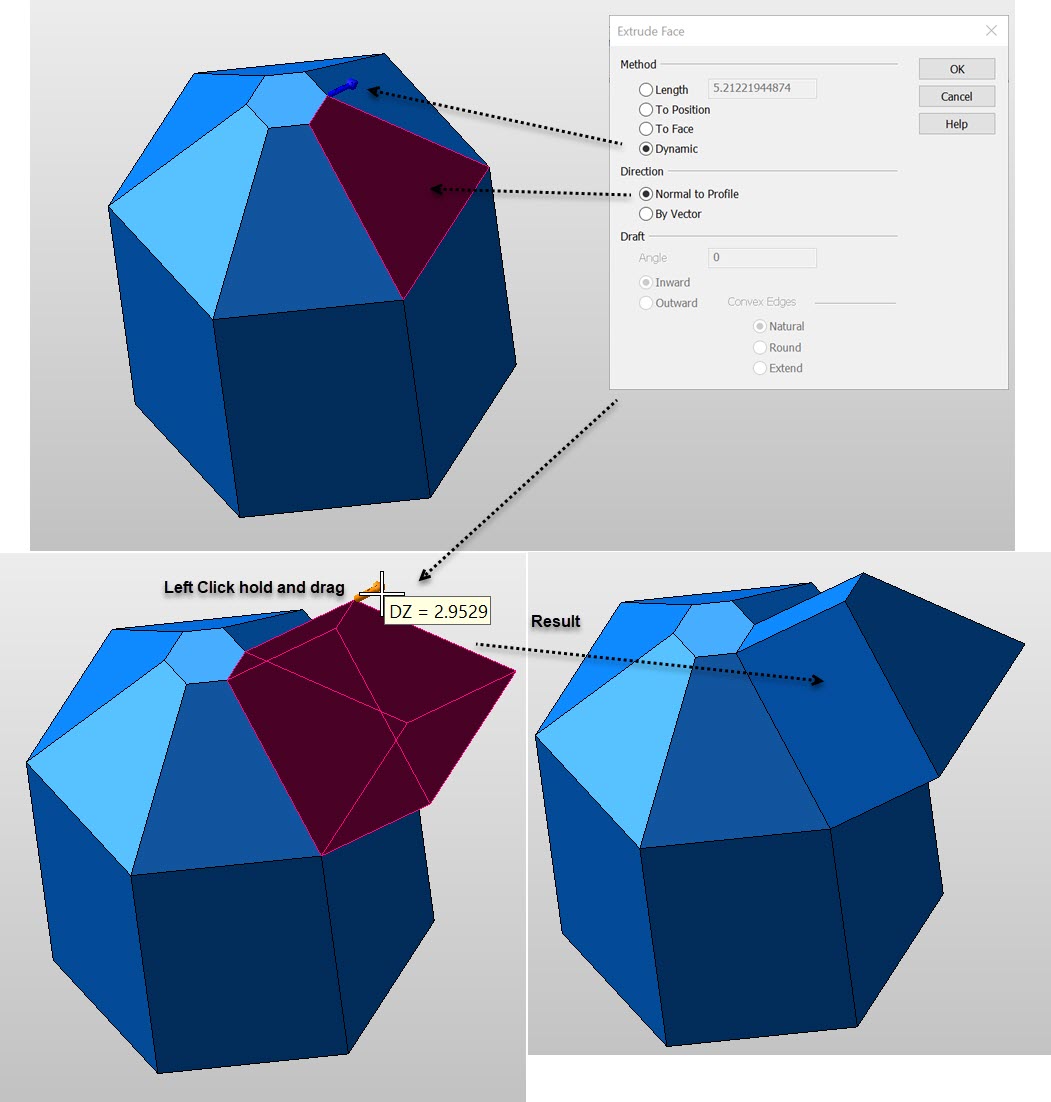
Dynamic - Use this option to enable the DynaHandle to dynamically position the end extrude after choosing planar profile, ( set either Normal to Profile or By Vector). Right click on DynaHandle to view more positioning options:
Right Click DynaHandle Context Menu Example
Direction
The options in the Extrude direction section can be used to determine the direction of the extrusion. The extrusion vector used will be the normal vector of the face if Normal to Profile is selected. In this case, the face must be planar. If you select By Vector instead, the face does not need to be planar.
-
Normal to Profile - When selected, the extrusion vector used will be the normal vector.
-
By Vector - When selected, you will later be prompted to select a vector by which the face will be extruded.
Draft
The options under Draft allow you to specify a draft angle and direction.
-
Angle - Specify a draft angle in the editable field.
-
Inward - When selected, an inward draft will be performed.
-
Outward - When selected, an outward draft will be performed. The Convex Edges options then become available for selection.
Convex Edges
The options under Convex Edges allow you to specify how convex corners will be handled.
-
Natural - Extends the two shapes along their natural curves until they intersect.
-
Round - When selected, convex edges will be rounded.
-
Extend - Draws two straight tangent lines from the ends of each segment until they intersect.
Example Modify Solid Face Extrude:
|