KeyCreator / Modify / Warp / Twist
This function provides the capability to twist solids, Surfaces and wireframe entities. This is ideal for modeling parts that are manufactured in a flat condition then twisted into final shape. Keep in mind that when twisting, one part stays fixed in place, while the other side of the part rotates along with the twist. The part of the body (if any) before the starting point of the twist axis is the side that remains fixed. The part of the body (if any) after the twist's ending point will be rotated about the axis by the amount of the twist angle. The region of twist is defined by two points, which you must indicate. These two points define a line that serves two purposes. First, it defines the axis about which the twisting occurs. Secondly, it defines the extents of the twist region. Perpendicular planes at each end of the line are intersected with the body being twisted, and only the area between the planes will be modified.
Using the Function:The required steps might change depending upon what settings are chosen in the dialog box for the function.
Dialog Options: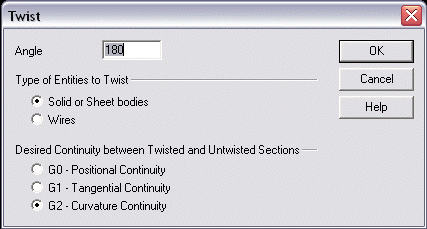
AngleEnter a twist angle in the editable field. The twist angle is set to 180 degrees by default. There is no limit to the angle of twist. A positive twist angle indicates the direction of the twist, but you may specify a negative angle if you want to twist in the opposite direction. The two points selected to define the axis of twist also indicate the direction of the "Z" axis. Use the right-hand rule to determine the positive direction of twist. Type of Entities to TwistIndicate the entity types you intend to twist.
Desired Continuity between Twisted and Untwisted SectionsSpecify the desired continuity from the three available settings: G0, G1, or G2.
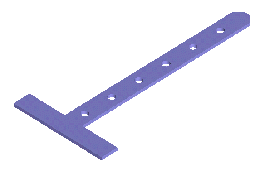
Above > The part before twisting 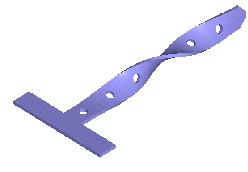
Above > The part after a 275 degree twist. The twist region starts at the centerline of the first hole and ends at the tip |