Pencil Trace

Use the Pencil Trace feature to create a toolpath where the tool is tangent to two surfaces. When this feature is selected, the Pencil Tracing dialog appears, containing offsets and tolerancing settings, among others. Once you have configured the available dialog settings, select OK. The toolpath is then created.
Dialog Options:
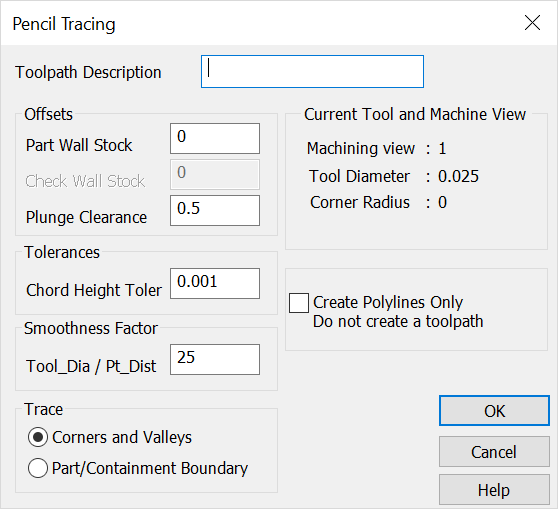
Toolpath Description
Specify a name or description for the toolpath being created.
Offsets
-
Part Wall Stock – Specify how much stock to leave in 3D.
-
Check Wall Stock – Specify the distance away from the check geometry the cutting tool will remain.
-
Plunge Clearance – Specify a height above the cutting plane at which the Z-Axes will go into feed mode.
Tolerances
Chord Height Tolerance – Specify the maximum deviation from the surface.
Smoothness Factor
Tool_Dia / Pt_Dist – Specify a smoothness factor. This assumes an optimum number of points for smooth machining. Increasing the number will create more points in the tool path. Decreasing the number will do the opposite.
Create Polylines Only
When checked, the toolpath is created without any properties. The geometry that is created can be used for geometry building, or manipulated and turned into a path with the Geometry to Toolpath feature (available from the Special submenu).
Trace
Corners and Valleys – When checked, a toolpath is created that contains the corners and valleys of your geometry model.
Part/Containment Boundary – When checked, a toolpath is created only around the part and the containment boundary, excluding all corners and valleys.
Current Tool and Machine View
Verify that the machining view, tool diameter, and corner radius are correct.