KeyCreator / Modify / Warp / Plane to Surface

KeyCreator Modify Solid Warp Plane to Surface


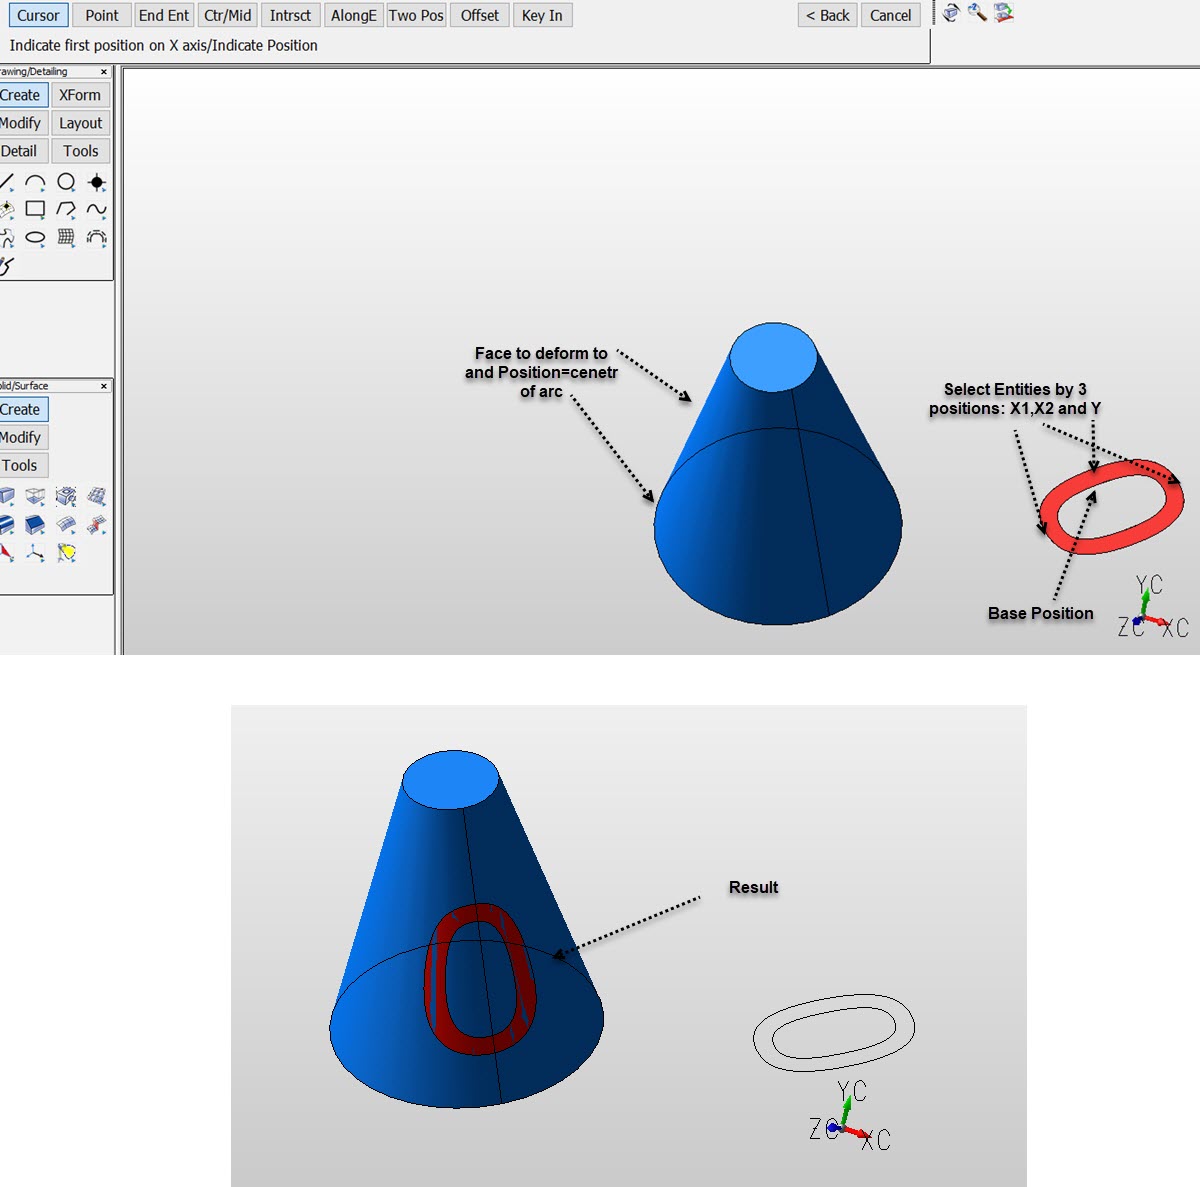
This function allows you to warp a set of bodies from a planar surface to a non-planar one. For example, you could use this function as you design a tire tread on a flat surface and then warp it to a revolved surface. Or, you are designing a shoe tread flat and then use this function to warp to the sole of a shoe. Still another example is to warp lettering around an object.

Using the function
  1. With the model open, click Modify>Warp>Plane to Surface.

  2. Select bodies to warp. This can be one or more bodies. For example, if you were warping extruded text to a surface, you would want to warp all the letters simultaneously rather than one letter at a time.

  3. Select planar face that determines the "from" location. For the extruded text example, you would want to select the planar face behind one of the letters.

  4. Select a non-planar face that determines the "to" location. This would be the curvy face onto which you warp the letters.

Note regarding animation of warped bodies and the Warp Plane to Face dialog box, shown below, which is available for this function: You can move the warped bodies around on the "to" face. If you find that the orientation of the bodies is not what you had expected, you can use the dialog to flip the warped bodies about their X-, Y- and Z-axes. Also, you can rotate about the Z-axis by entering angles in the Plane rotation edit field.
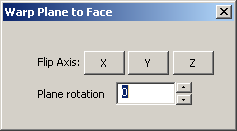
KeyCreator Modify Solid Warp Plane to Surface options
  1. When you are satisfied with the new orientation of the warped bodies, commit to the warp by choosing a location. The Warp Plane to Surface function does not unite the warped bodies to the new surface.

    Example Modify Warp Plane to Surface:
    KeyCreator Pro Modify Warp Plane to Surface example