Fastener Set

Fastener Sets Chart

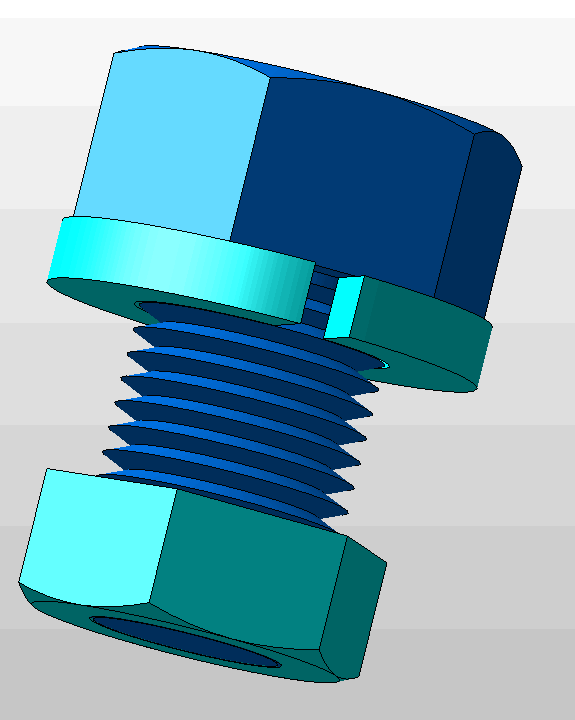
Set Elements Placement
- The nut if selected is placed at the bottom of the fastener. The bottom of the fastner and nut will be flush/even with each other.
- Upper washer if used is placed below fastener head with no spacing.
- Lower washer ,(if used) is placed just above nut, (if used) with no spacing or at the bottom of fastener, (washer and fastener bottom are flush/even).
- Review the DynaHandle topic to learn how to place the fastener set once created.
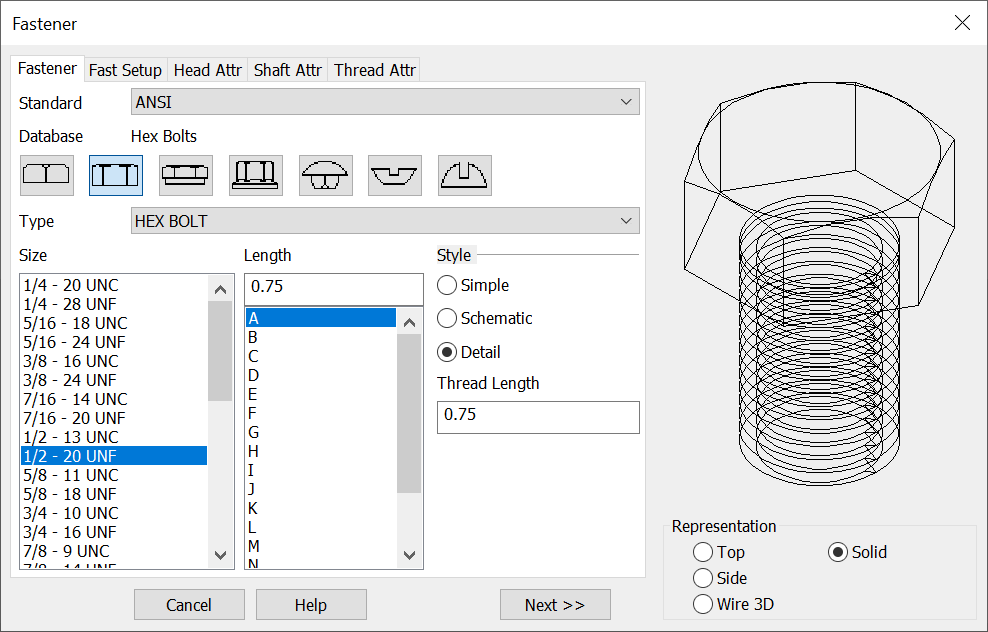
Defining the Fastener
-
After selecting the fastener type from the conversation bar options select a size for the fastener from the Size list.
-
Pick a Length for the fastener by choosing a standard length from the pull down list or entering a length in the text field. The Length text field can be disabled in the global configuration (see Setup). If you enter a length in the text field, the Fastener program will automatically decide if partial threads are an option for that length. If the length you entered for the fastener is large enough, then the Thread Selection dialog box will appear.
-
When you are finished with your selections choose Next. Remember that 3D and Solid fasteners will be created in the -ZV direction. For detailed info on defining the fastener see Creating Fasteners The representation type picked in this dialog will carry over to any Nut and Washer defined for the set.
Sample Hex Bolt
The Washer Dialog
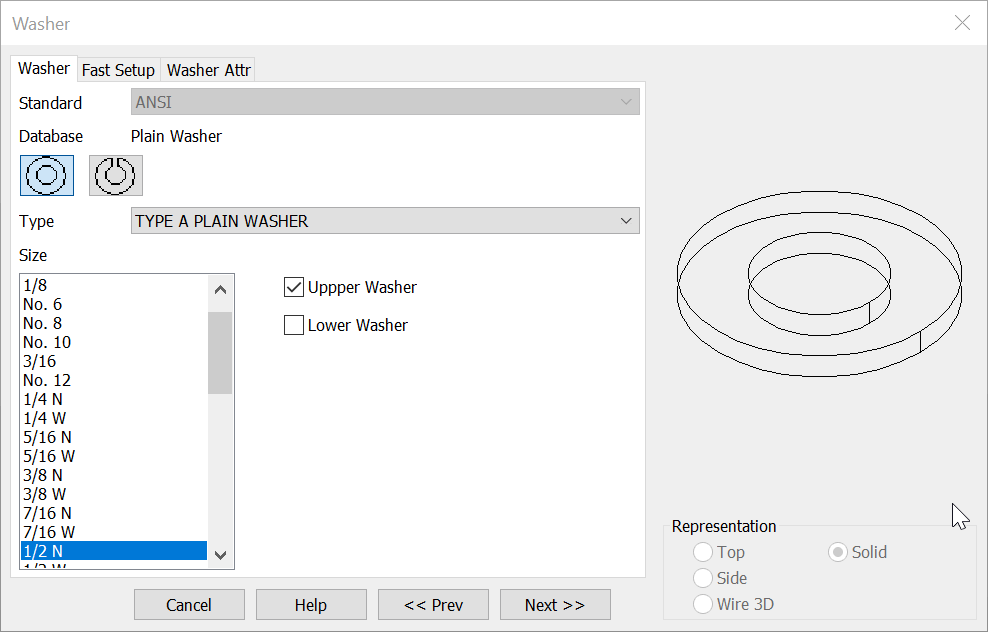
- The Washer dialog shows an auto selected washer size based on the fastener size selected.
- Check the upper and or lower check box to create washer(s). Uncheck both if washers are not being used in the set.
- Once the washer dialog is complete choose next for the Nut Dialog or <<Prev to return to the fastener dialog.
The Nut Dialog
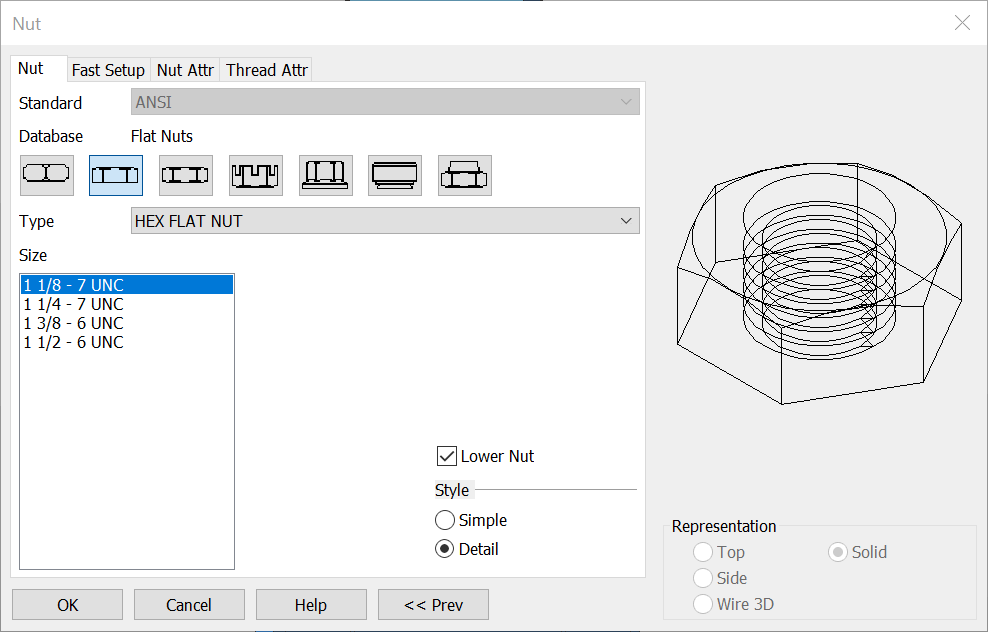
- The Nut dialog shows an auto selected nut size based on the fastener size selected.
- Check the lower nut check box to create a nut. Uncheck if a nut is not being used in the set.
- Once the Nut dialog is complete choose OK to begin placement of the fastener set using the dynahandle or <<Prev to return to the fastener dialog.
Fastener Set Example